Project management
General concepts
Project management introduces an entity called “Project” which helps isolating and managing assets (such as Plans, Keywords, Executions, etc) throughout the application.
The main benefit of working with projects and assigning entities to projects is essentially an ergonomic one: when selecting a project, entity lists will be implicitely filtered based on the selected project. When creating new entities and when entities spawn other new entities (such as a plan or a task triggering a new execution), the spawned entities will pick up the project property from the currently selected project or from the initiating entity, depending on context.
For instance, the resource and the keywords created upon uploading a keyword package will be part of the same project.
Another benefit is that the project’s id can also be used to compute statistics on a specific group of entity instances. For instance, after applying a specific Project to the prepopulated dashboard “ProjectOverview”, execution and measurement statistics relating specifically to this project and this project only will be computed and displayed.
Prepopulated Projects
A couple of predefined projects will be created automatically by step upon starting the controller:
System
The “System” project is designed to store step’s internal entities (for instance plans, keywords and scheduler tasks used for Housekeeping since 3.11.X). This way, internal executions and future self-related entities (such as potential self-monitoring plans) can be isolated from business projects.
Common
The “Common” project is designed to store common entities to all projects(common Keywords, common execution parameters, etc). Per default only admin users are able to select this project and create entities within it. Other users will see all the entities available in this project inside their own projects and will also be able to reference/use them.
[all]
Selecting the special tenant “[all]” in the project list enable users to see all entites across all projects. Picking this tenant will lead you to the same situation as in the earlier versions of step: no filtering happens and all entites are displayed. This tenant is not meant to be used to create entities or run executions but only to display all the entities of all projects. It is only accessible to admin users. Strictly speaking this isn’t a project but a special mode.
Side note: User roles
There a four default roles provided in step, granting different levels of permissions. While we will not go into all the details, here is a short overview of the roles, ordered from least to most privileged:
- The guest role grants read-only access, while preventing modifications or executions.
- The tester role grants most privileges required for defining and executing test plans.
- The developer role (in addition) allows to define keywords, and to administer individual projects.
- The admin role has global administrator rights.
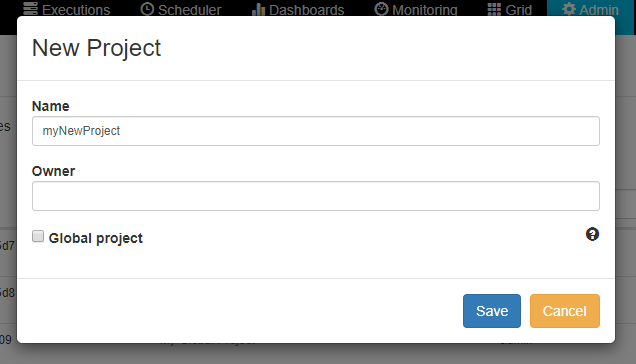
Creating a project
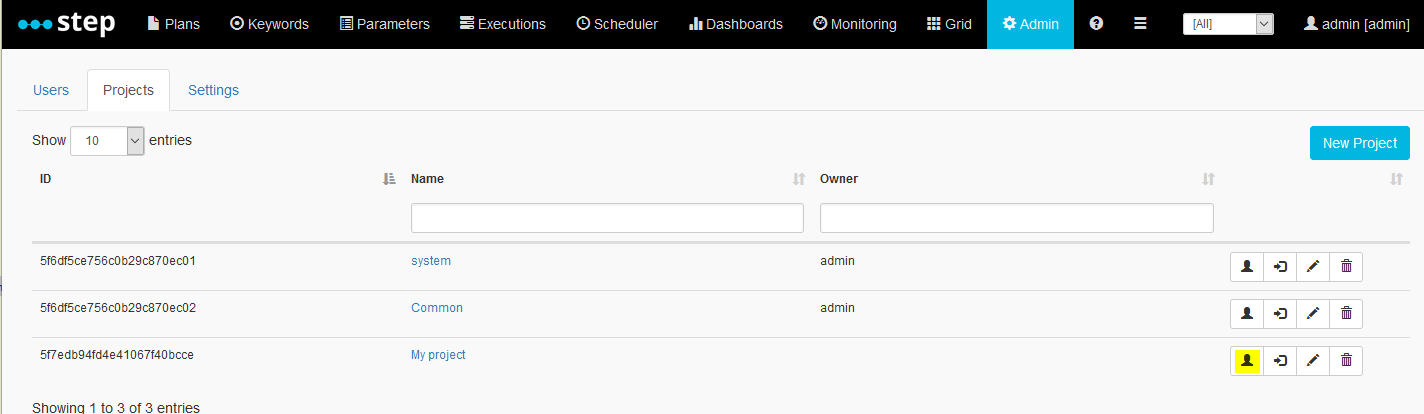
To create a project, head to the Admin -> Projects view:

Click the New project button, provide a project name (and an owner if you wish, but this field doesn’t have any effect yet) and click Ok:
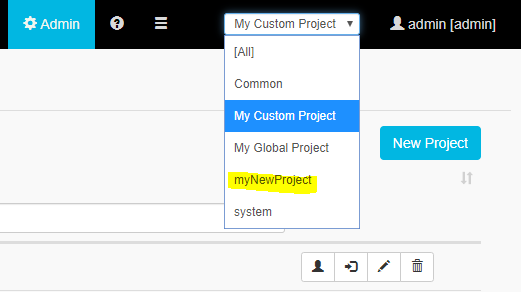
Your new project should appear in the list:

You should now be able to select it in the top right corner of the screen:
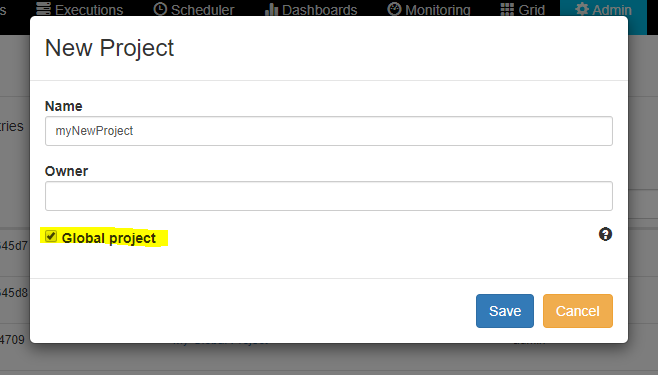
Global project
Each project can be declared as global. Entities of a global project are accessible to all the other projects. This is useful to share common entities across projects. To create a global project or make an existing project global, tick the “Global project” box :
Entities of a global project can be seen, referenced and called from any other project. To create a global entity, switch to a global project and create your entity in this project. Switching back to any other project you will see all the global entities as if they were part of the project. Global entities are marked with a specific icon in order to differenciate them from any project specific entity :

Assigning users to a project
As global administrator
Users having the role “admin” have access to all the projects. Other users have to be explicitly added as members to the projects.
To add a member to a project, head to the Admin -> Projects view and click the “Add/Remove users” button of the project:
As project administrator
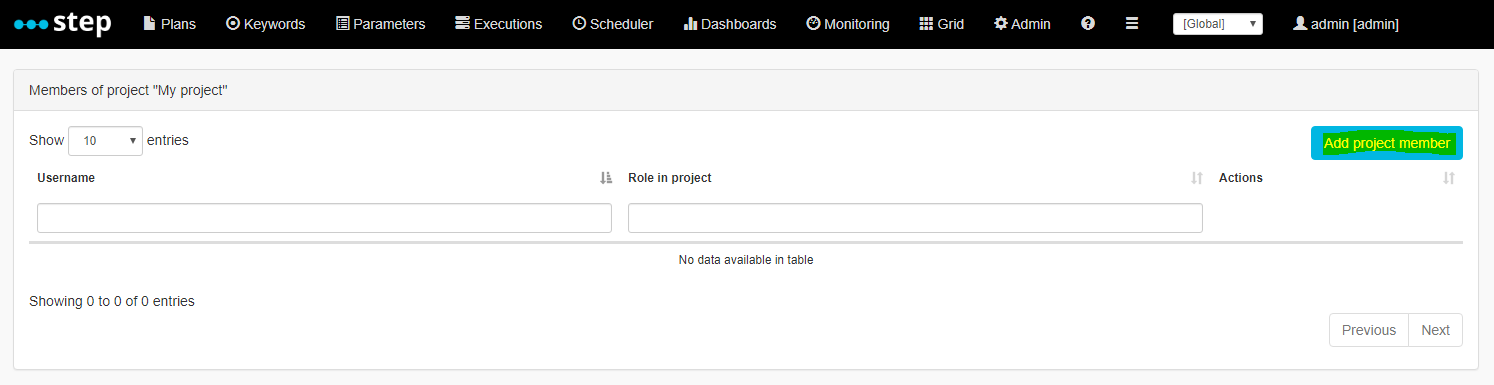
If you are not a global administrator, but a developer / project administrator, use the Settings -> Project Settings view instead:

Click the “Add project member” button
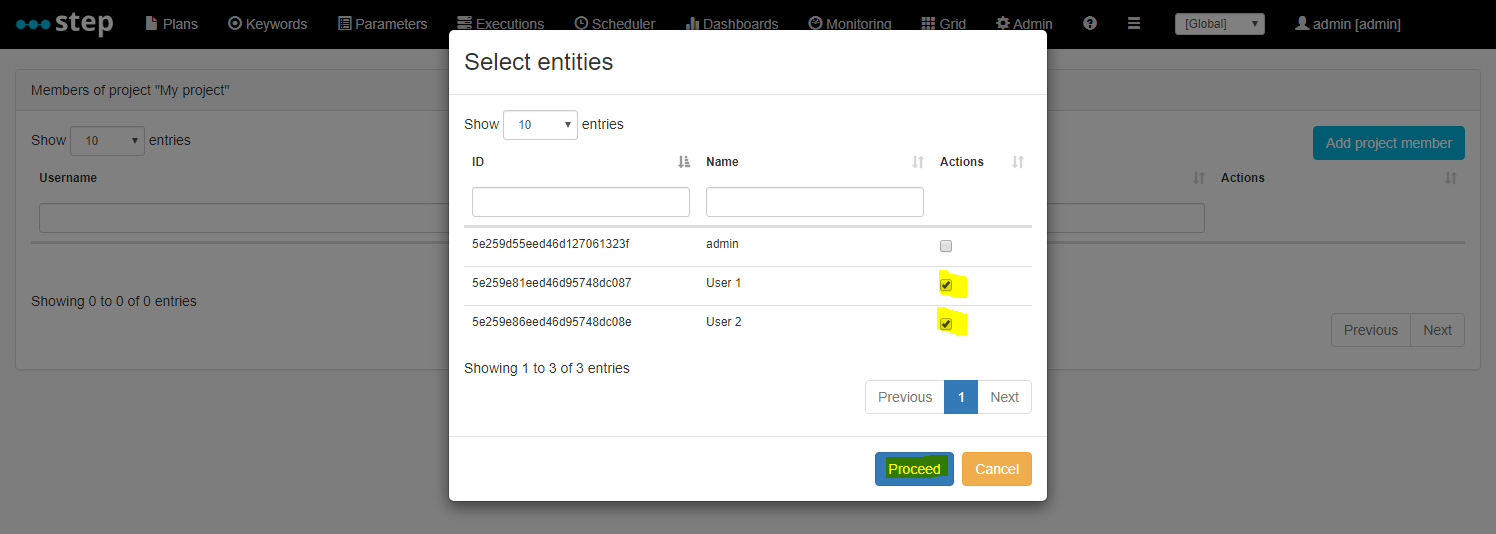
Select the users to be added to the project
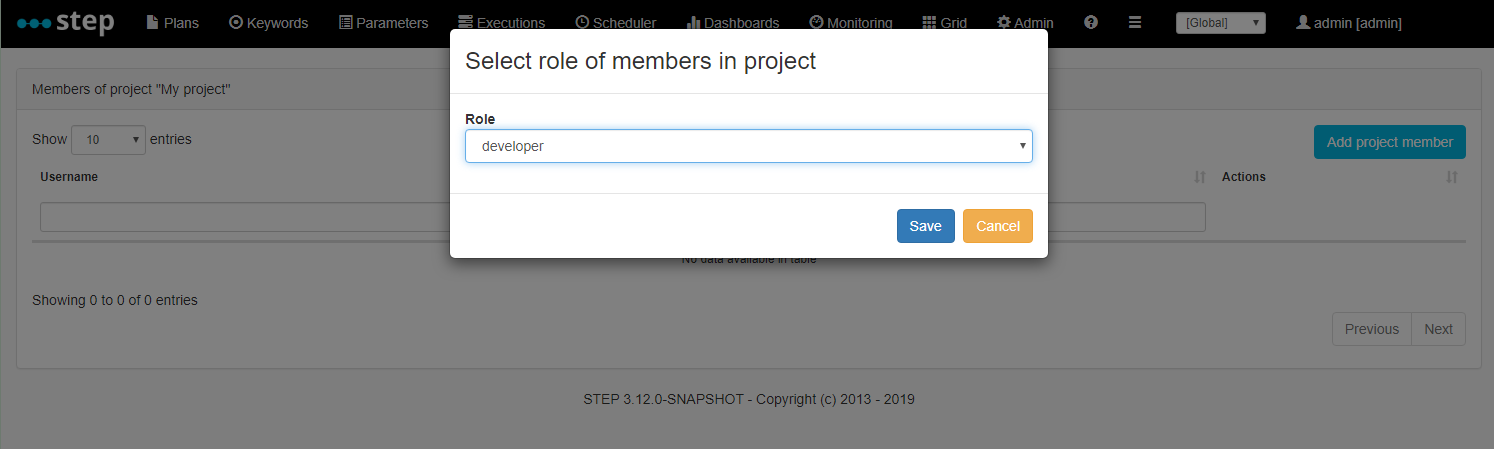
Select the role of these users within the project. If left empty the default role of the user specified at user creation will be used as project role.
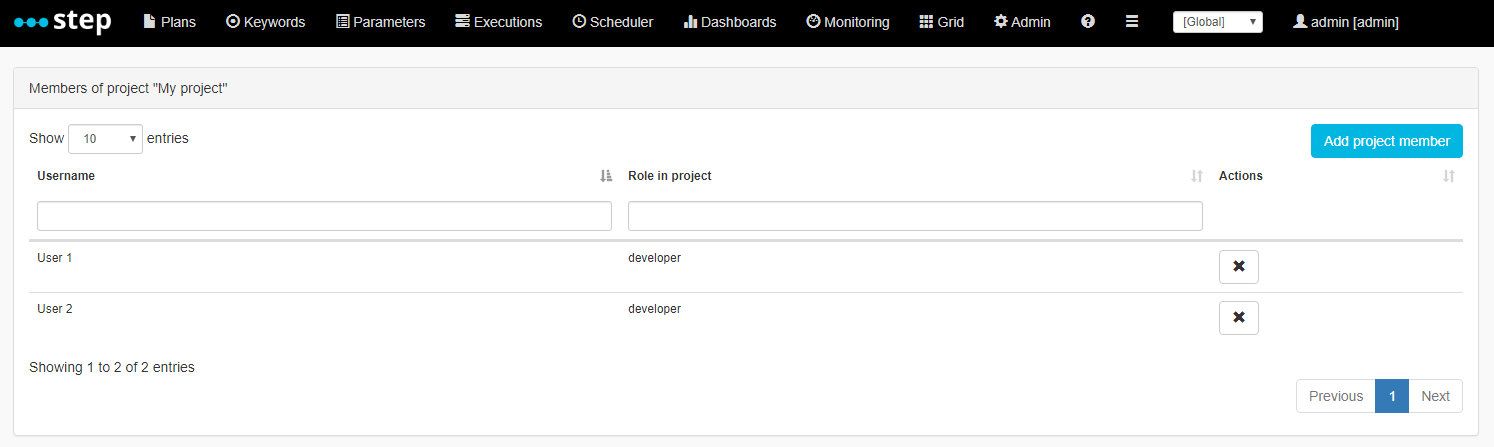
The new members should now appear in the member list of the project
Working with projects
To work inside a specific project, select the project of your choice from the project selector on the top right hand corner. When a project is selected you will only be able to see entities of this specific project and all the entities of all global projects:

All the entities created within the selected project will implicitly be assigned to this project and won’t be accessible from other projects unless you’re working n a global project.
If you run a plan inside a specific project, the resulting execution will be assigned implicitly to the current project.
Other entities (Keywords, Parameters, Screen configurations, etc) and related views work the same way.
Assigning/Migrating entities to a project
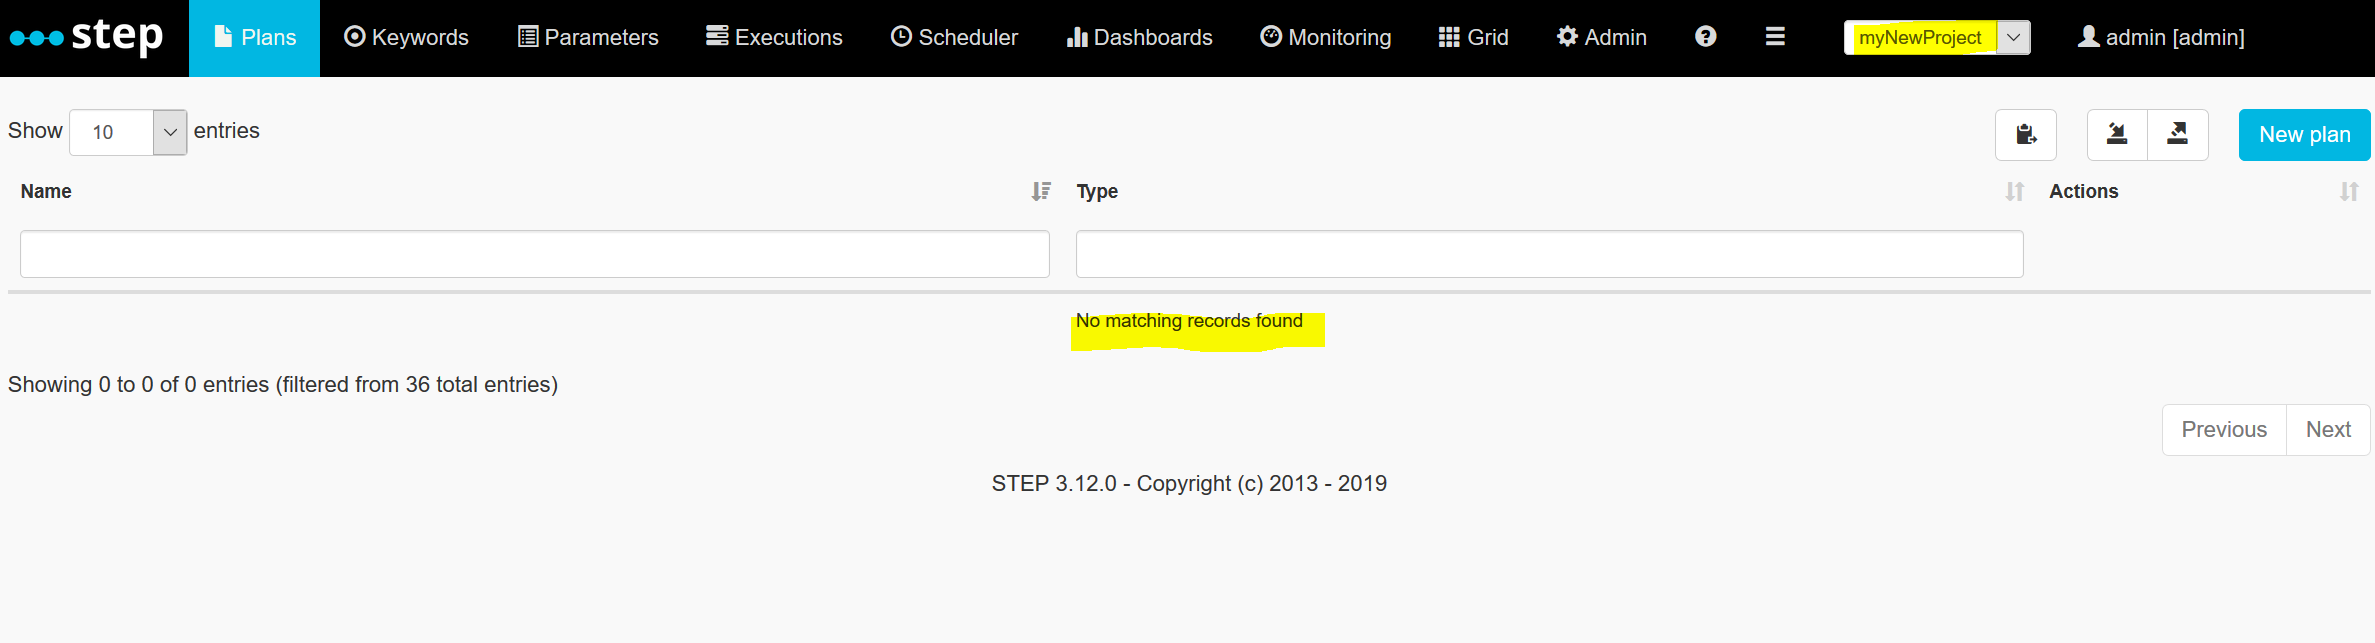
If you’re migrating from an earlier version of step (< 3.12), all of your entities will be found in the tenant “[all]” by default (i.e. not assigned to any project). In order to assign them to your new project(s), you will need to use the “Assign Entity” function of your project. Let’s migrate our newly created plan, currently belonging to the project “myNewProject” to a different project which we will call “TargetProject”.
Let’s first make sure we have selected the source project (in our scenario, that’s “myNewProject”):
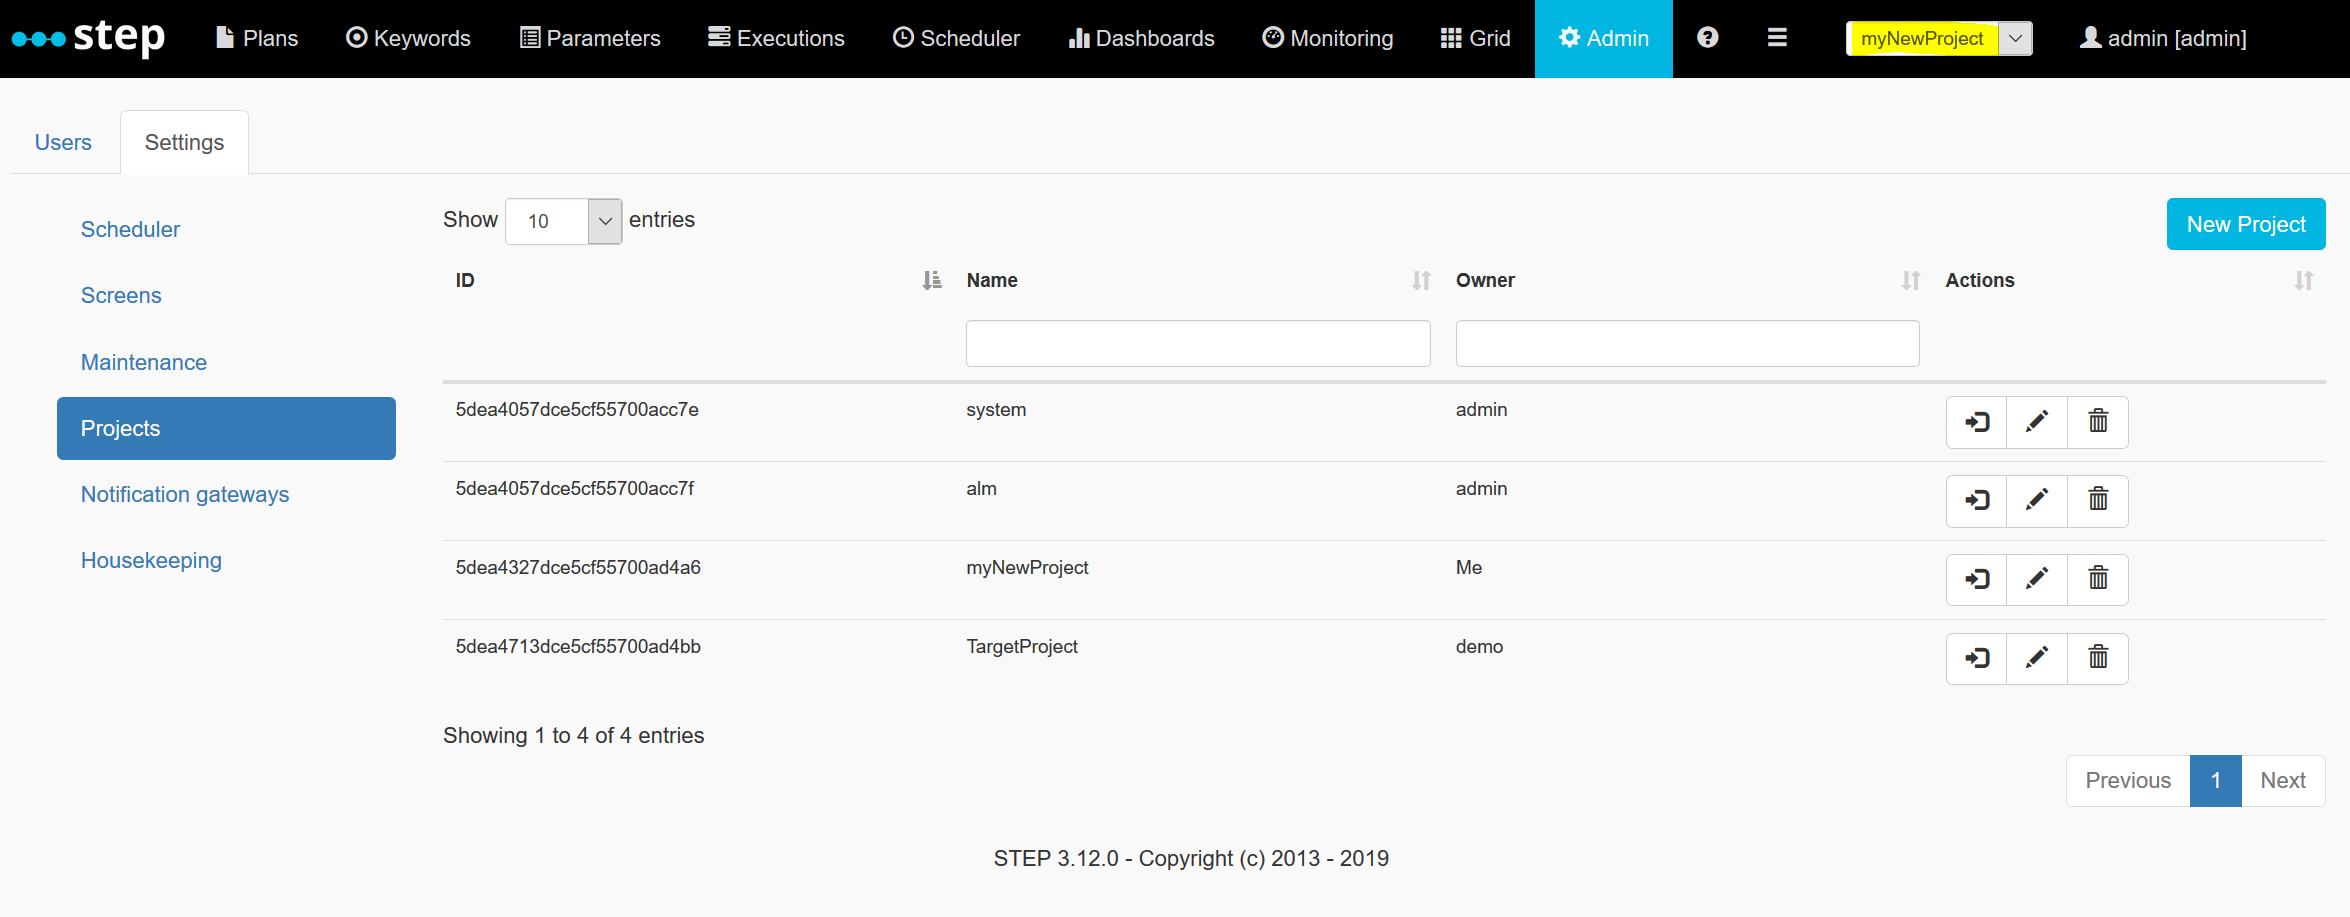
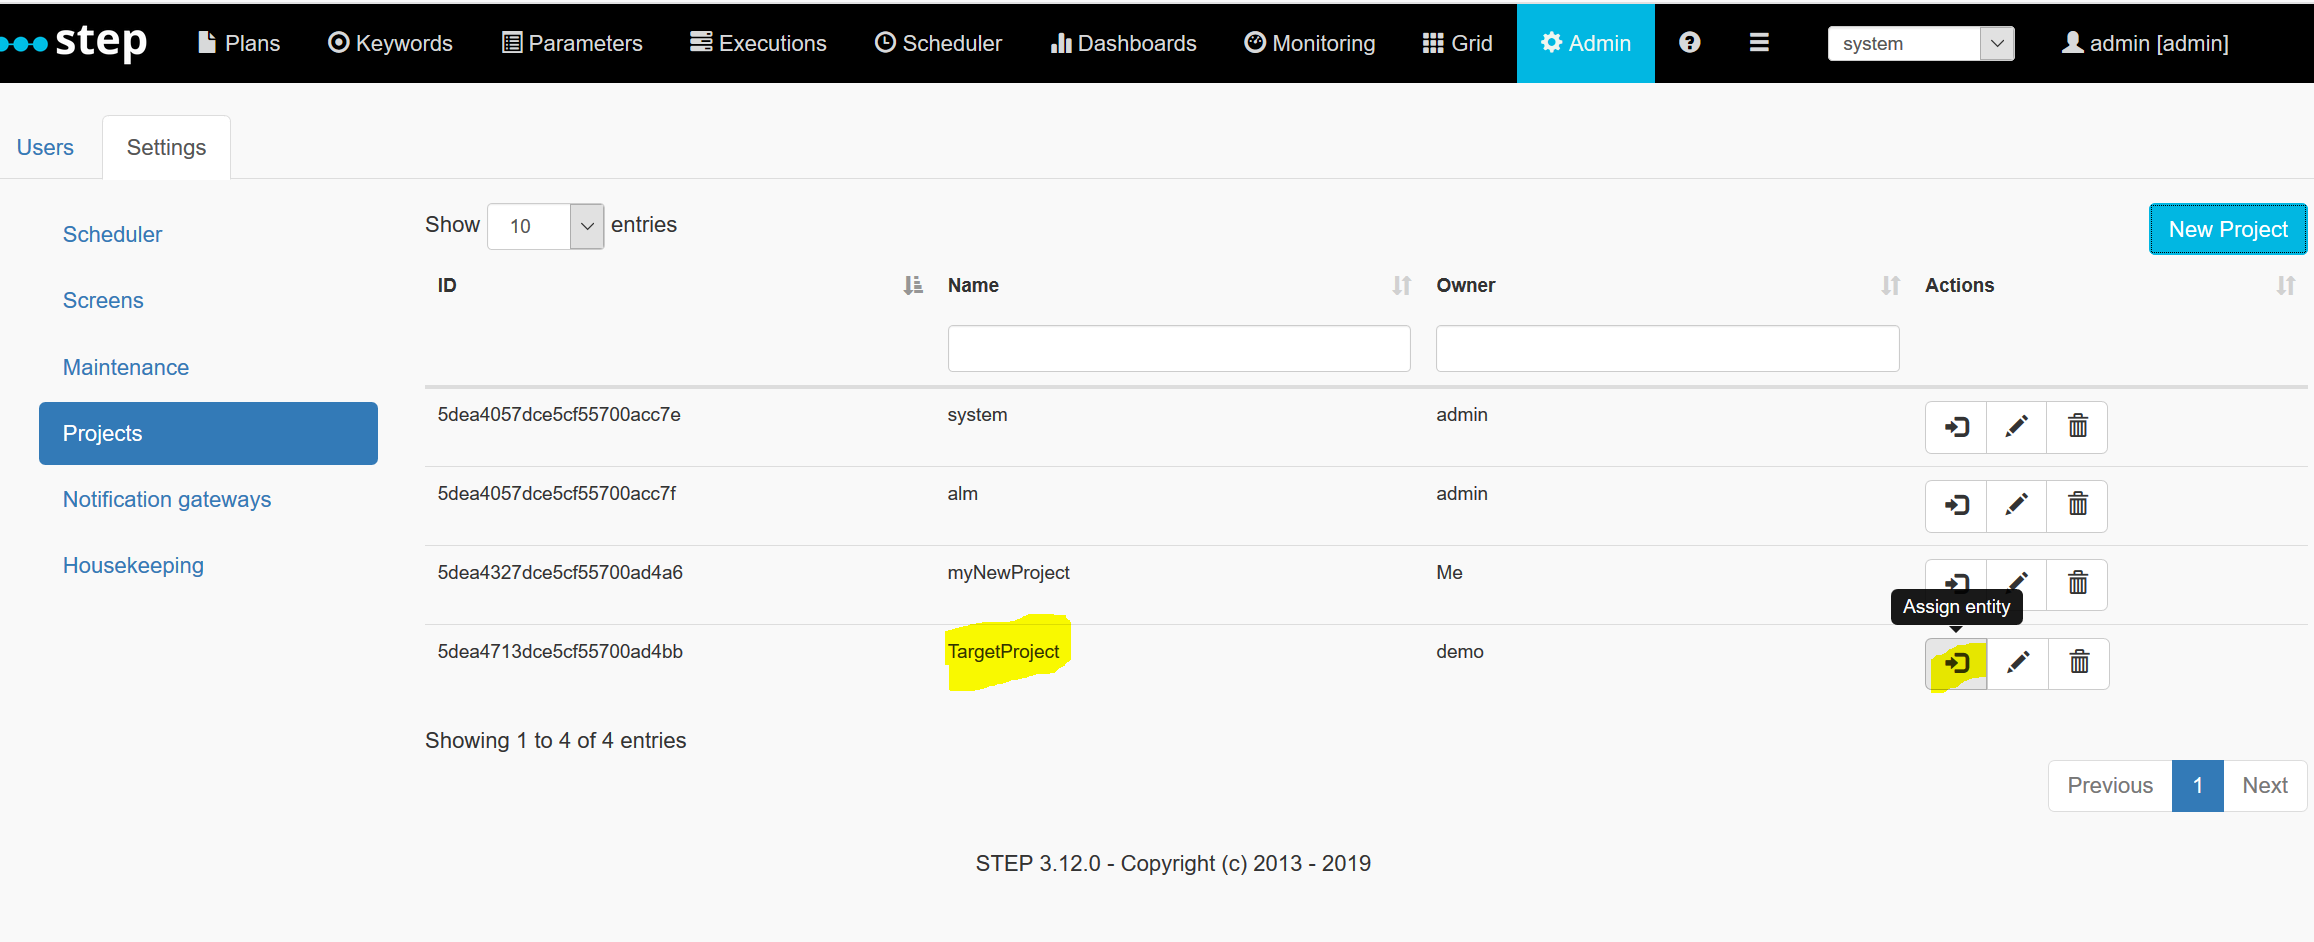
Let’s now click the Assign Entity button of the destination project(for us, that’s “TargetProject”):
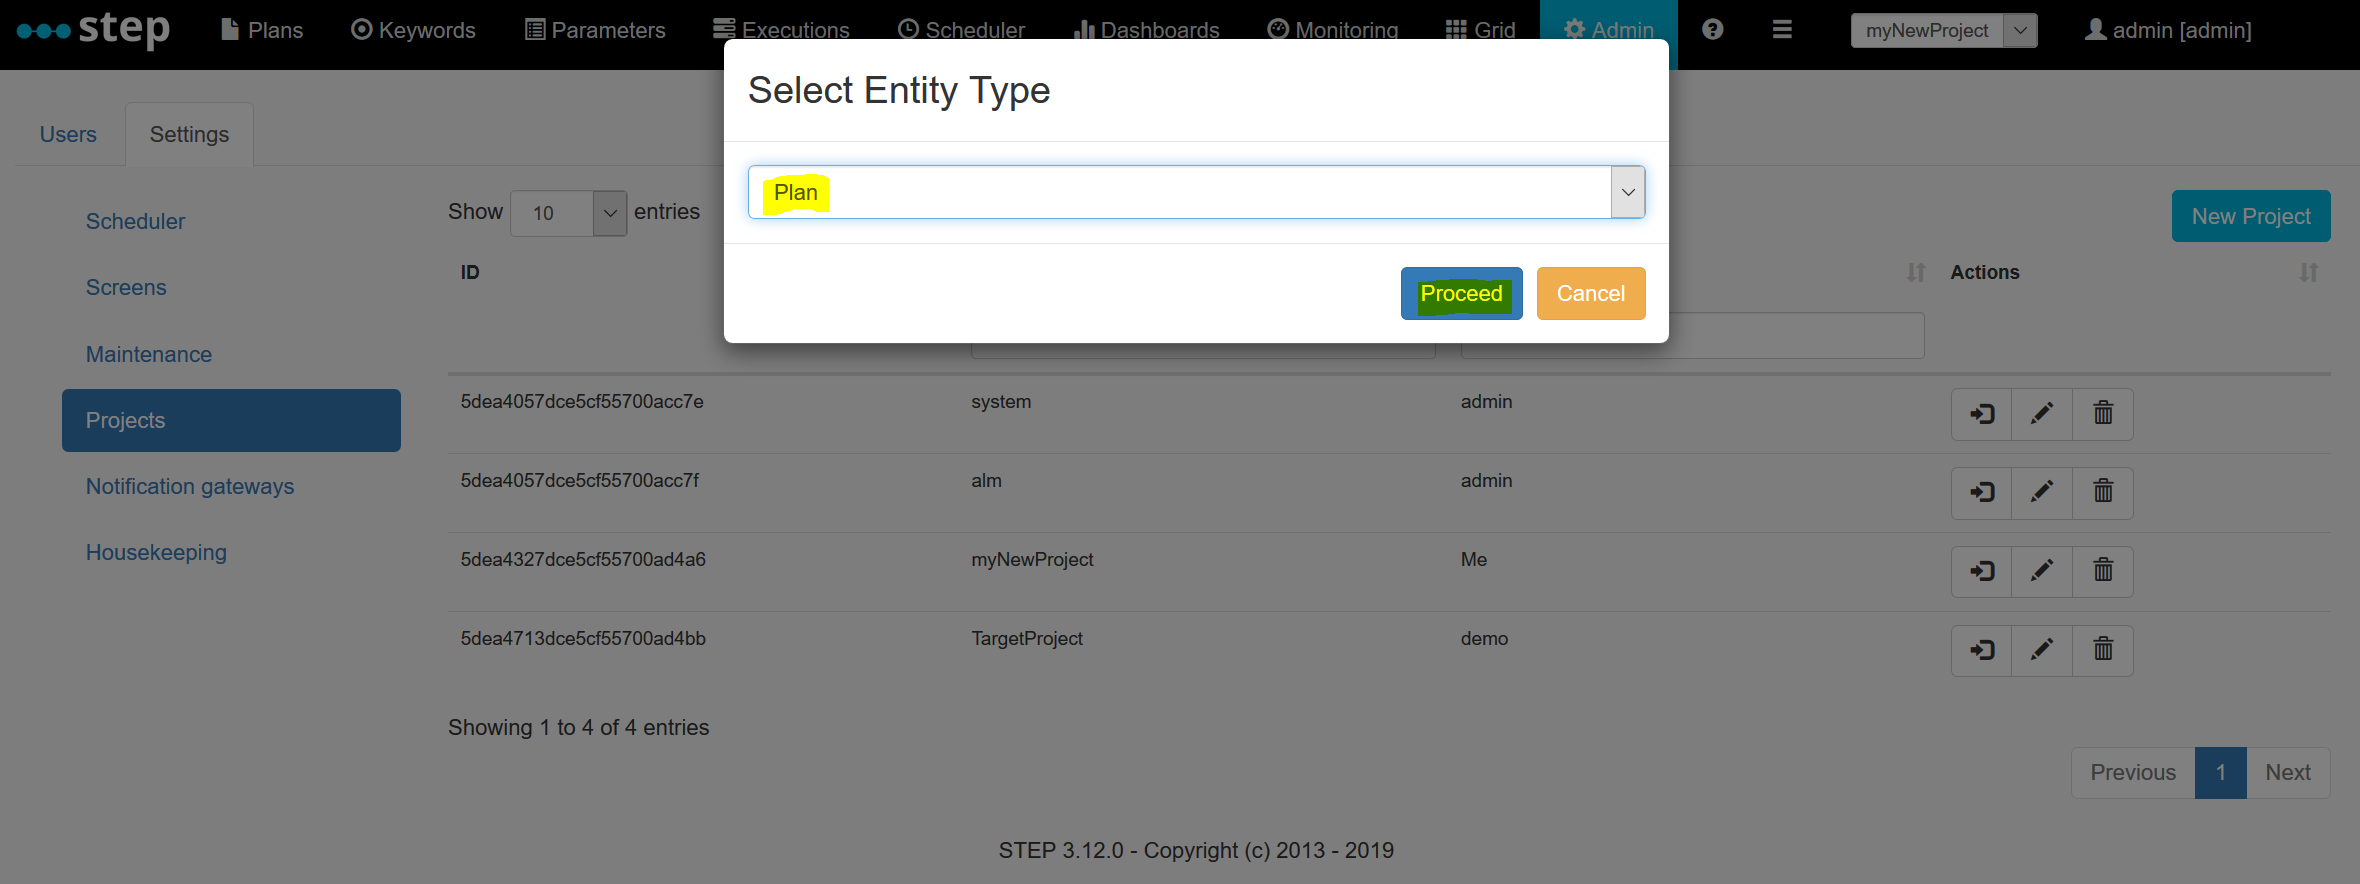
Select the “Plan” entity type and Proceed:
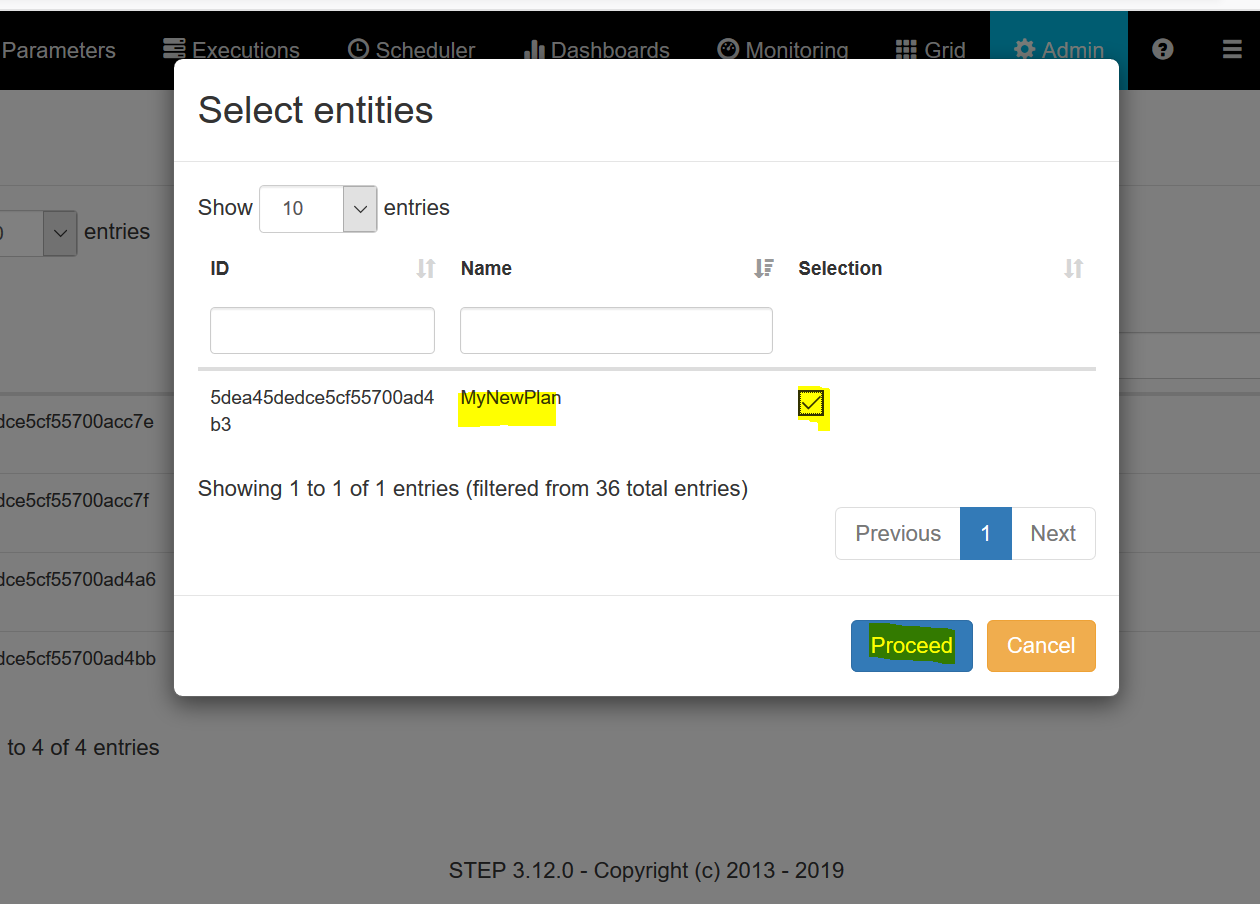
Tick the box(es) the entity instance(s) you wish to migrate (in our case, just our new plan) and Proceed:
If we now go to the Plan view, we will see that our source project is empty:
And if we switch to our destination project, we’ll find our migrated plan:

Note: this works the same way for every other entity type.