Browser automation
While step is capable of much more than just automating browsers, this is a popular use of the platform and a good way to get your feet in the water. We’ll use Selenium, Chrome and ChromeDriver as our toolkit of choice here, but keep in mind that you could achieve similar results using other browsers or even a different runtime such as step’s Node.JS agent and Pupeteer to interact with Chrome.
Pre-requisites
- You’ve completed the local step installation guide
- You’ve completed the creation of your first keyword
- JDK 11 installed
- Eclipse, IntelliJ or any other Maven-enabled Java IDE installed
Project configuration
Chromedriver
For interacting with Chrome, a compatible version of ChromeDriver must be installed. Please check your local version of Chrome and refer to the following page in order to download the right driver version. As you can see from the following figure, since v73, a new version of the driver is provided with each major release:

Make sure to unzip the chromedriver binary into a proper installation folder and add this folder to yoour system’s PATH variable. If you cannot add it to the system’s PATH, remember the path to the chromedriver binary as we’ll need to set it in our project explicitly.
Project initialization with Git
If you’re already familiar with tools such as Git, Maven, JUnit and Eclipse, you can go ahead and clone our samples project right away:
git clone https://github.com/exense/step-samples.gitThe samples discussed in this guide are contained in the maven project demo-selenium-keyword located in the folder step-samples\keywords\java.
Creating a maven project
If you’re interested in a step-by-step initialization of a step project with Eclipse and Maven, this section will be relevant, otherwise just skip to the description of the keyword’s code.
You can download Eclipse here which should be shipped by default with Maven. If you’re already familiar with Maven, just move on to the next sub-section.

- Click File -> New -> Other… -> Choose Maven Project from the list
- Check the Create a simple artefact checkbox then click Next
- Enter ch.exense.step.examples as a Group Id and demo-selenium-keyword as Artefact Id then click Next
- A project will appear in your Project Explorer, along with several sub-folders and a pom.xml file in which dependencies and other project properties will be managed.
Make sure that JDK 11 is installed as your default Java environment (Windows -> Preferences -> Java -> Installed JREs) and that your project is configured to use it (Right click on project -> Properties -> Java Build Path -> Libraries).
Dependencies
step & Selenium dependencies need to be added to the maven project’s pom.xml:
  <properties>
        <project.build.sourceEncoding>UTF-8</project.build.sourceEncoding>
        <selenium.version>3.14.0</selenium.version>
        <step-api.version>1.0.0</step-api.version>
  </properties>

  <dependencies>

    <dependency>
        <groupId>ch.exense.step</groupId>
        <artifactId>step-api-keyword</artifactId>
        <version>${step-api.version}</version>
    </dependency>

    <dependency>
        <groupId>org.seleniumhq.selenium</groupId>
        <artifactId>selenium-api</artifactId>
        <version>${selenium.version}</version>
    </dependency>
    <dependency>
        <groupId>org.seleniumhq.selenium</groupId>
        <artifactId>selenium-java</artifactId>
        <version>${selenium.version}</version>
    </dependency>
  </dependencies>
Build plugin
Step supports different packaging alternatives. Here, we will opt to package our Keyword code as an uber jar via maven’s share plugin by adding the following snippet to our maven project’s pom.xml file:
<build>
  <plugins>
    <plugin>
      <artifactId>maven-compiler-plugin</artifactId>
      <version>3.1</version>
      <configuration>
        <source>1.8</source>
        <target>1.8</target>
      </configuration>
    </plugin>
    <plugin>
      <groupId>org.apache.maven.plugins</groupId>
      <artifactId>maven-shade-plugin</artifactId>
      <version>3.2.1</version>
      <executions>
        <execution>
          <phase>package</phase>
            <goals>
              <goal>shade</goal>
            </goals>
        </execution>
      </executions>
    </plugin>
  </plugins>
</build>
Your project should now look like this:

Keyword code
Let’s now create a class called ChromeKeywords in the src/main/java folder of our project. This class will contain our automation code. In order to comply with step’s API and benefit from its services and features, in Java, Keyword classes will need to satisfy a couple of requirements:
- In order to communicate with step, the class will extend the AbstractKeyword superclass.
- Each method defining a Keyword will have to be annotated with the annotation Keyword, will use no arguments and will be of return type void
Let’s look at a simple Selenium code snippet for starting chrome and navigating to a URL, and the result once integrated as a step Keyword:
import org.openqa.selenium.By;
import org.openqa.selenium.chrome.ChromeDriver;

import step.handlers.javahandler.AbstractKeyword;
import step.handlers.javahandler.Keyword;

public class ChromeKeywords extends AbstractKeyword{

	@Keyword
	public void createAndNavigate() {
	    //System.setProperty("webdriver.chrome.driver",
	    //		"D:\\chromedriver_win32\\chromedriver.exe");
	    ChromeDriver chrome = new ChromeDriver();
	    String homeUrl = "http://exense.ch";
	    chrome.navigate().to(homeUrl);
	    chrome.findElement(By.xpath("//a[contains(text(),'Consulting')]")).click();
	}
}
Note: if you haven’t added the chromedriver to your PATH, you have to uncomment the first line and set the path to the chromedriver binary explicitly using the system property webdriver.chrome.driver.
In a separate class called ChromeKeywordsTest, we will use JUnit to invoke our Keyword via step’s context, run it locally and build a basic test case. But first, let’s add the following dependency to our pom.xml in order to have access to JUnit’s functionality:
<dependency>
    <groupId>junit</groupId>
    <artifactId>junit</artifactId>
    <version>4.12</version>
    <scope>test</scope>
</dependency>
Now place the ChromeKeywordsTest class in the folder src/test/java.
import org.junit.Test;

import step.handlers.javahandler.KeywordRunner;
import step.handlers.javahandler.KeywordRunner.ExecutionContext;

public class ChromeKeywordsTest {

	@Test
	public void createAndNavigateTest() throws Exception {
		ExecutionContext ctx = KeywordRunner.getExecutionContext(ChromeKeywords.class);
		ctx.run("createAndNavigate", "{}");
	}

}
If you run the unit test mapped to the method createAndNavigateTest (by right clicking the method’s name and clicking Run As -> JUnit Test ), you should see an instance of Chrome start, take you to the exense.ch front page and quickly navigate to our Consulting page.
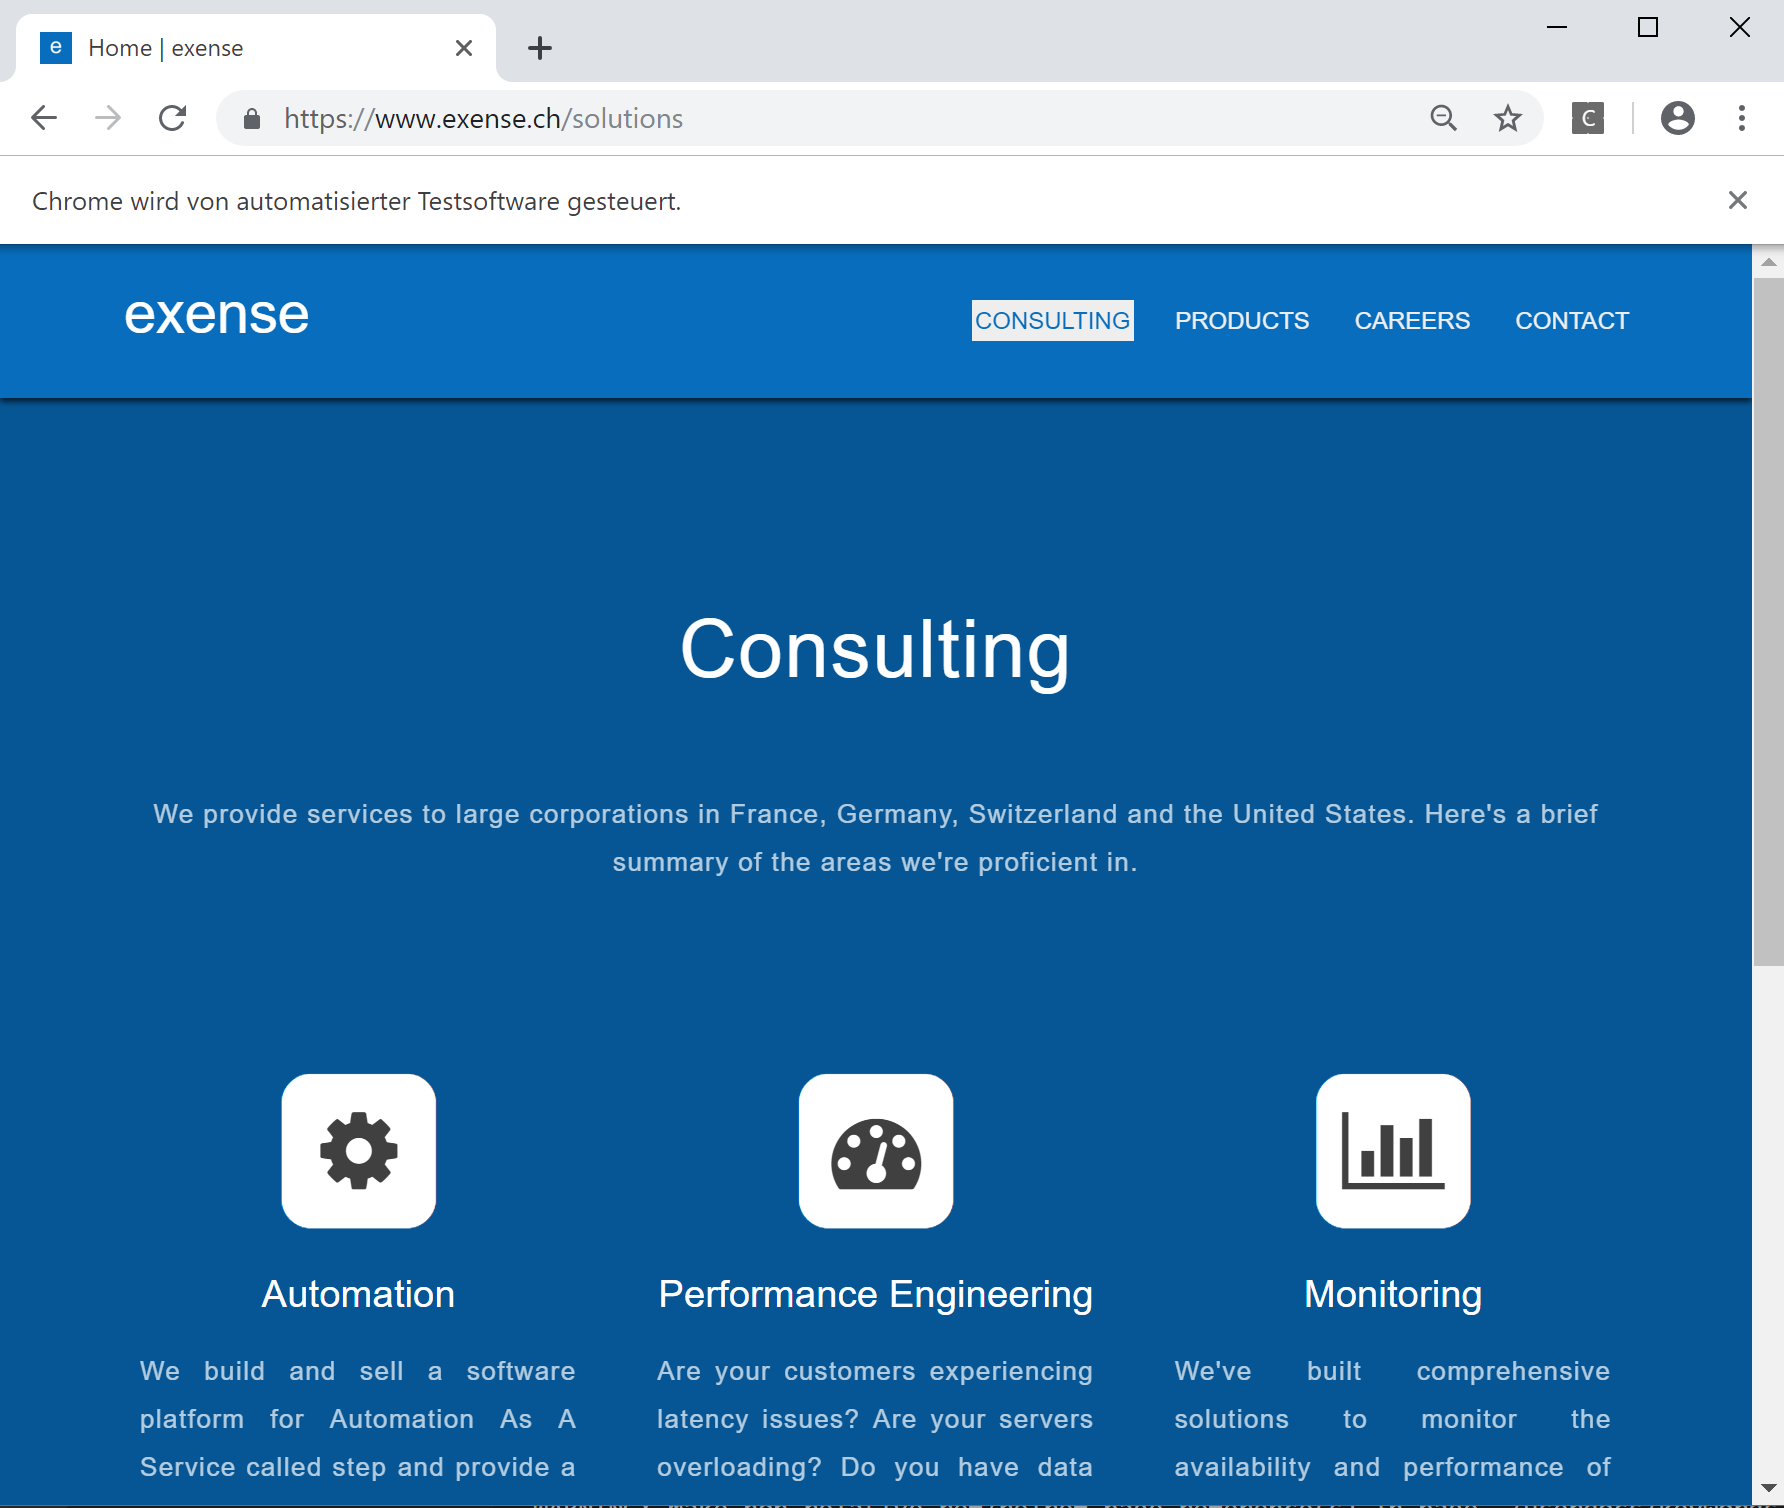
The final state of the spawned browser instance should look approximately like the screenshot above.
Deployment
Building the uber jar
You can now build your Keyword into a jar file containing all of its dependencies (Right click the pom.xml file -> Run As -> Maven build … -> Entering package as a Goal -> Checking the box Skip Tests -> Run)
The output will contain the explicit path to your uber jar file and should look like this:
[INFO] Replacing original artifact with shaded artifact.
[INFO] Replacing C:\git\step-samples\keywords\java\demo-selenium-keyword\target\demo-selenium-keyword-0.0.1-SNAPSHOT.jar with
 C:\git\step-samples\keywords\java\demo-selenium-keyword\target\demo-selenium-keyword-0.0.1-SNAPSHOT-shaded.jar
[INFO] Dependency-reduced POM written at: C:\git\step-samples\keywords\java\demo-selenium-keyword\dependency-reduced-pom.xml
[INFO] ------------------------------------------------------------------------
[INFO] BUILD SUCCESS
[INFO] ------------------------------------------------------------------------
[INFO] Total time: 26.724 s
[INFO] Finished at: 2019-05-16T13:05:12+02:00
[INFO] ------------------------------------------------------------------------
Registering the keyword
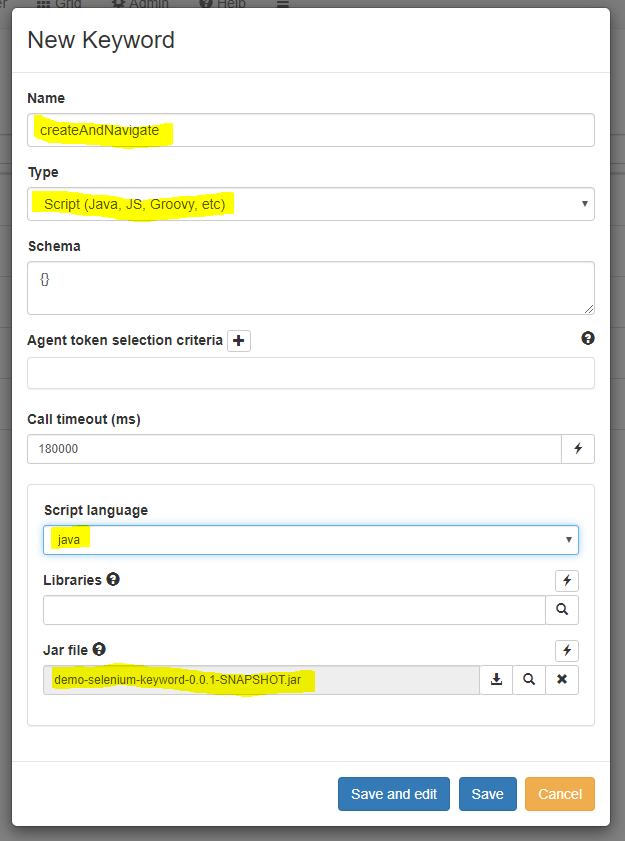
As done in the previous section, you can now declare your new Keyword on the new platform. This time however, the Keyword language will have to be switched to Java instead of Javascript. In this case, instead of directly editing the Keyword in the web application, we will upload our freshly created jar file to bind our code to this Keyword instance:
- In the step UI go to Keywords
- Click New keyword
- Fill out the form as follows
- Drag & drop the uber jar demo-selenium-keyword-0.0.1-SNAPSHOT.jar generated by maven to the field Jar file
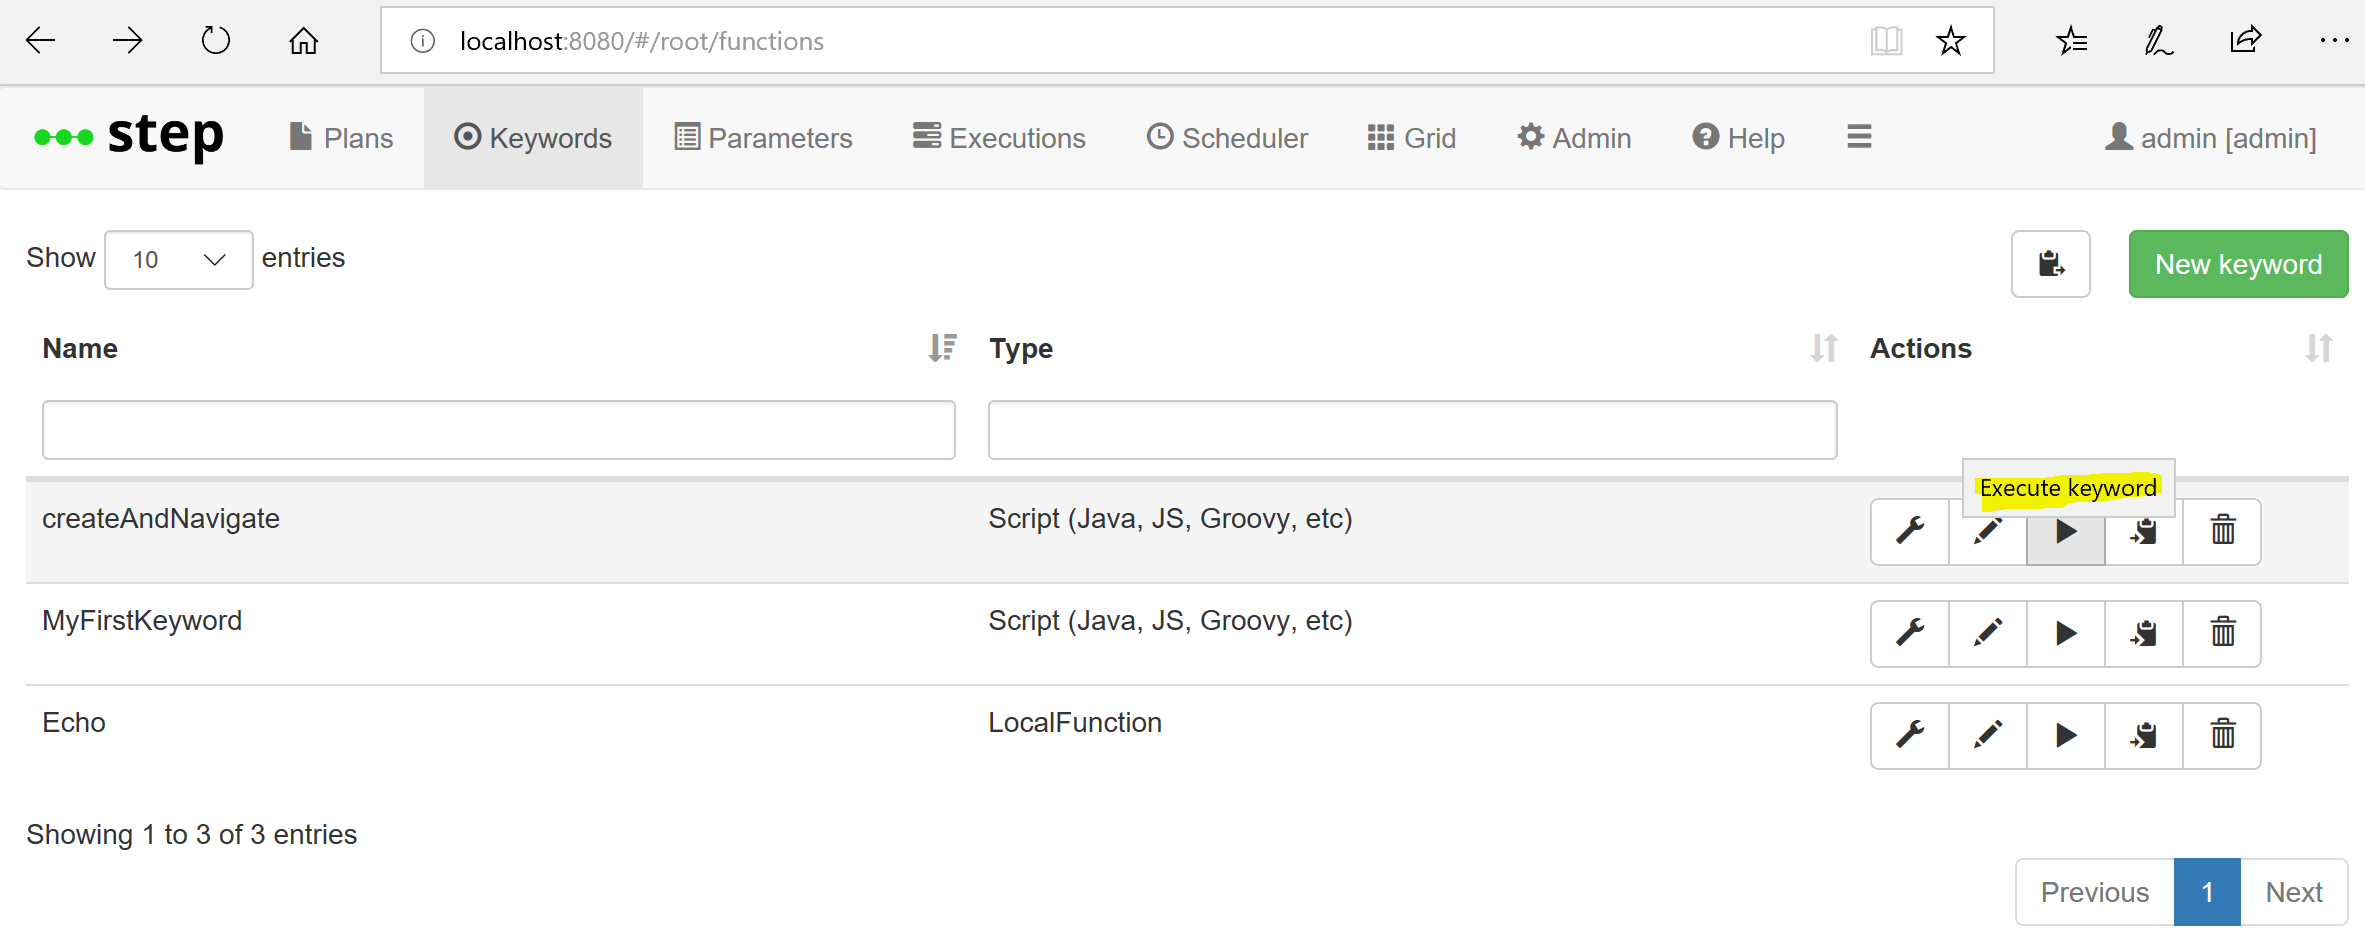
Running the Keyword on an agent
If you now click the play button of the corresponding entry in the Keyword list view,
which takes you to an interactive execution lab. It is a convenient alternative to creating a plan when you just want to test out your keyword. Then click play,
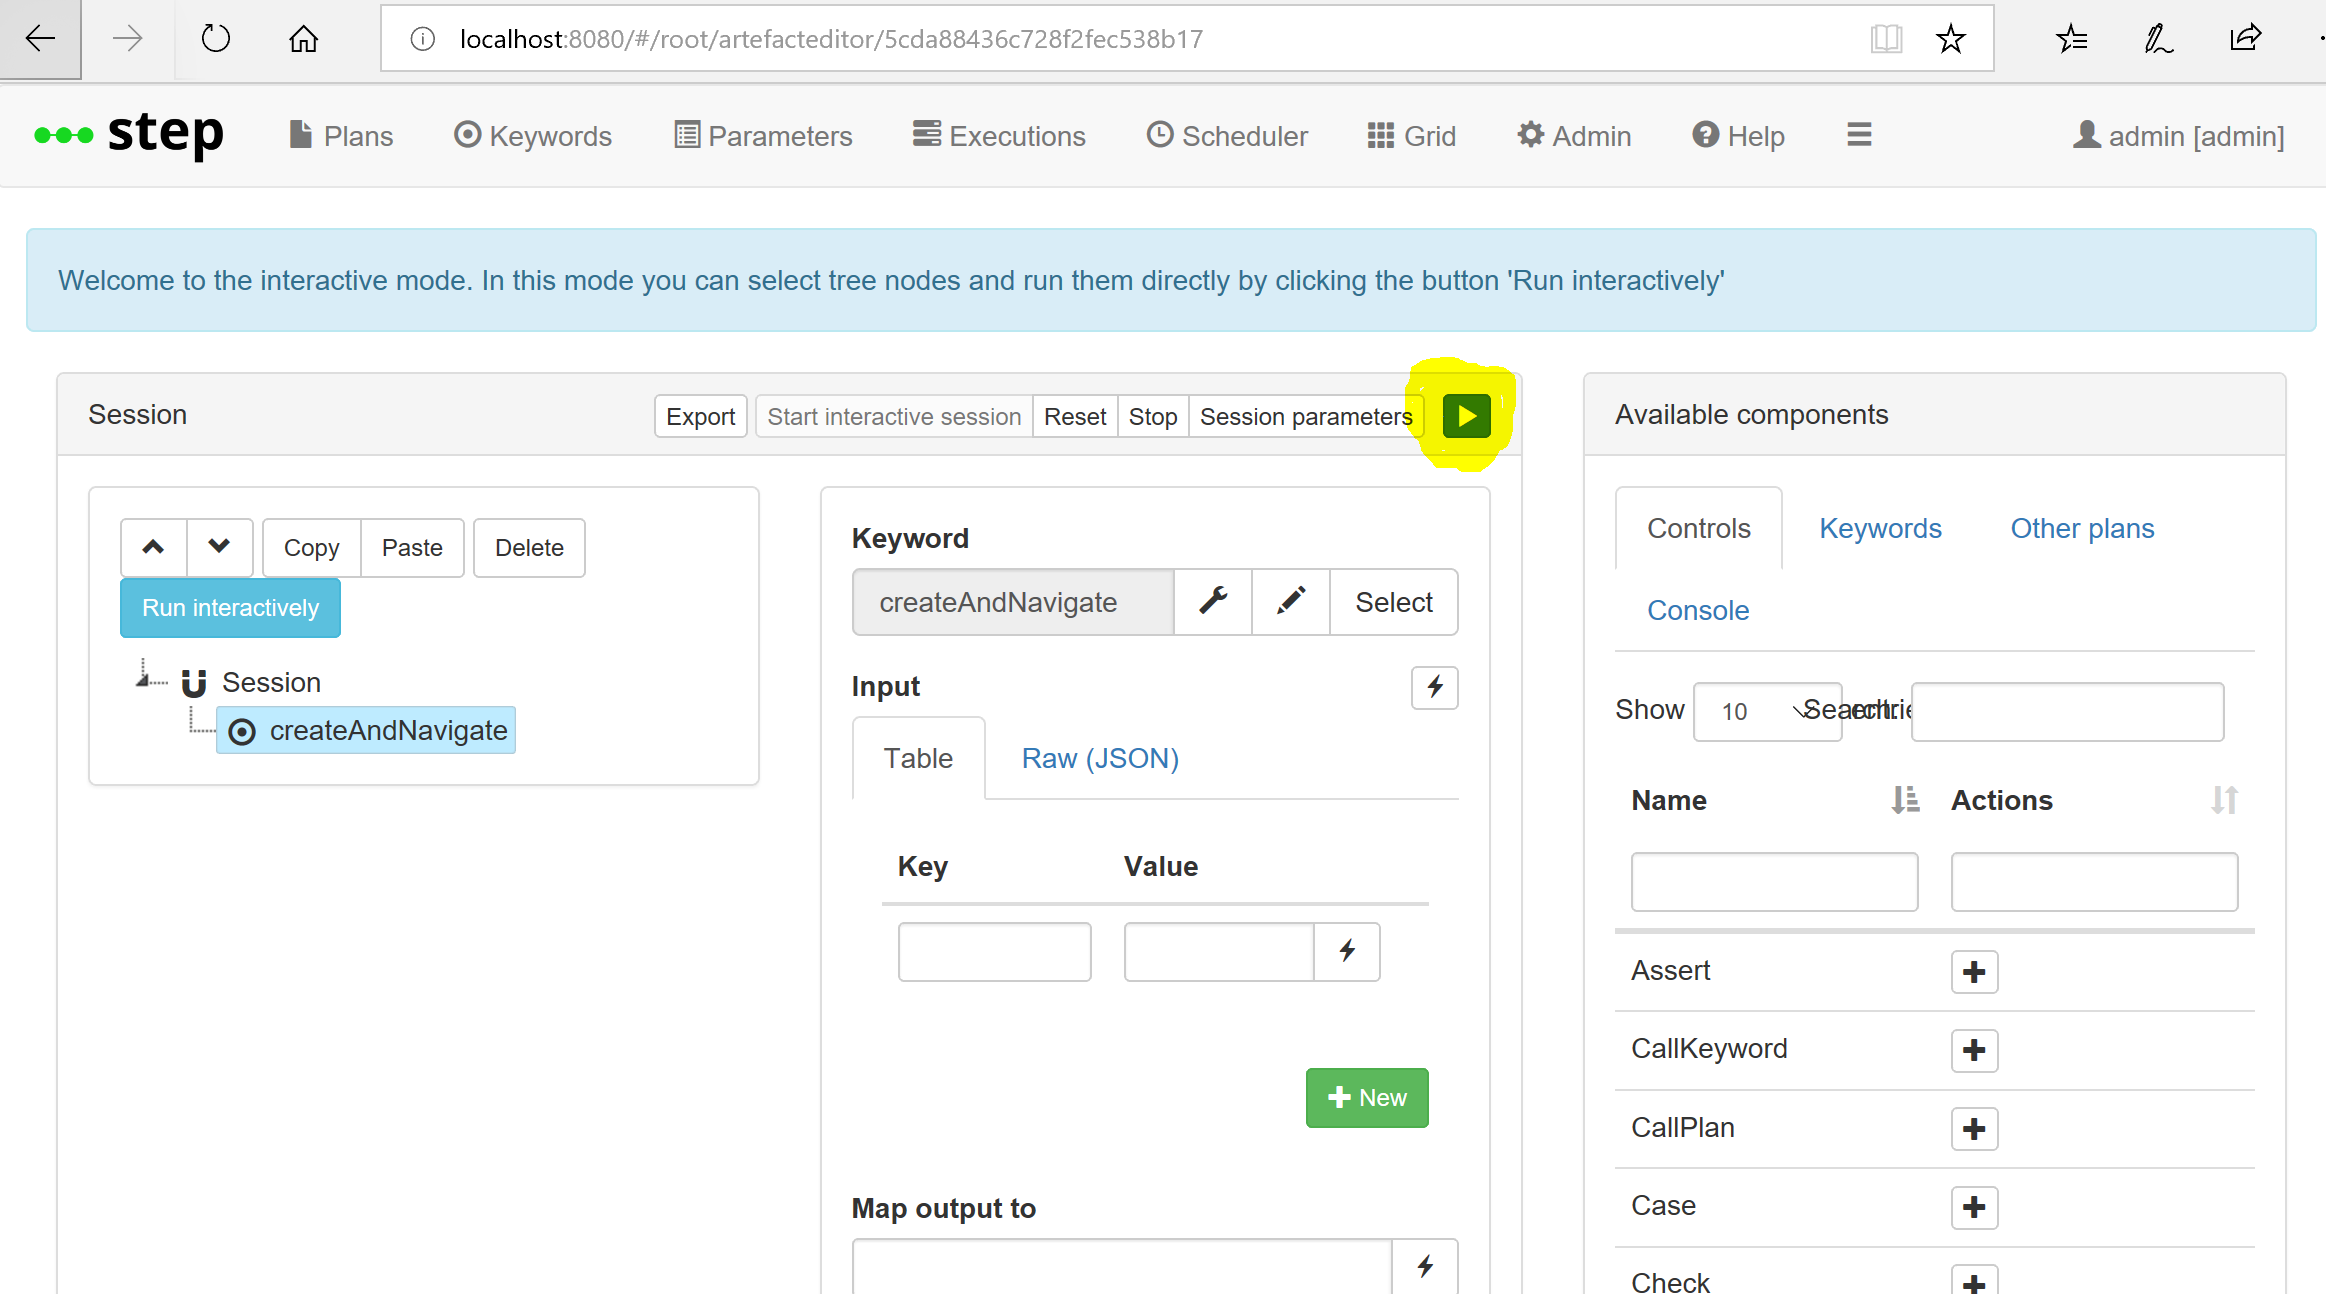
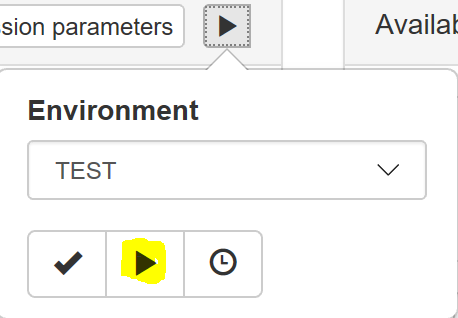
choose the default TEST environment and click play one last time,
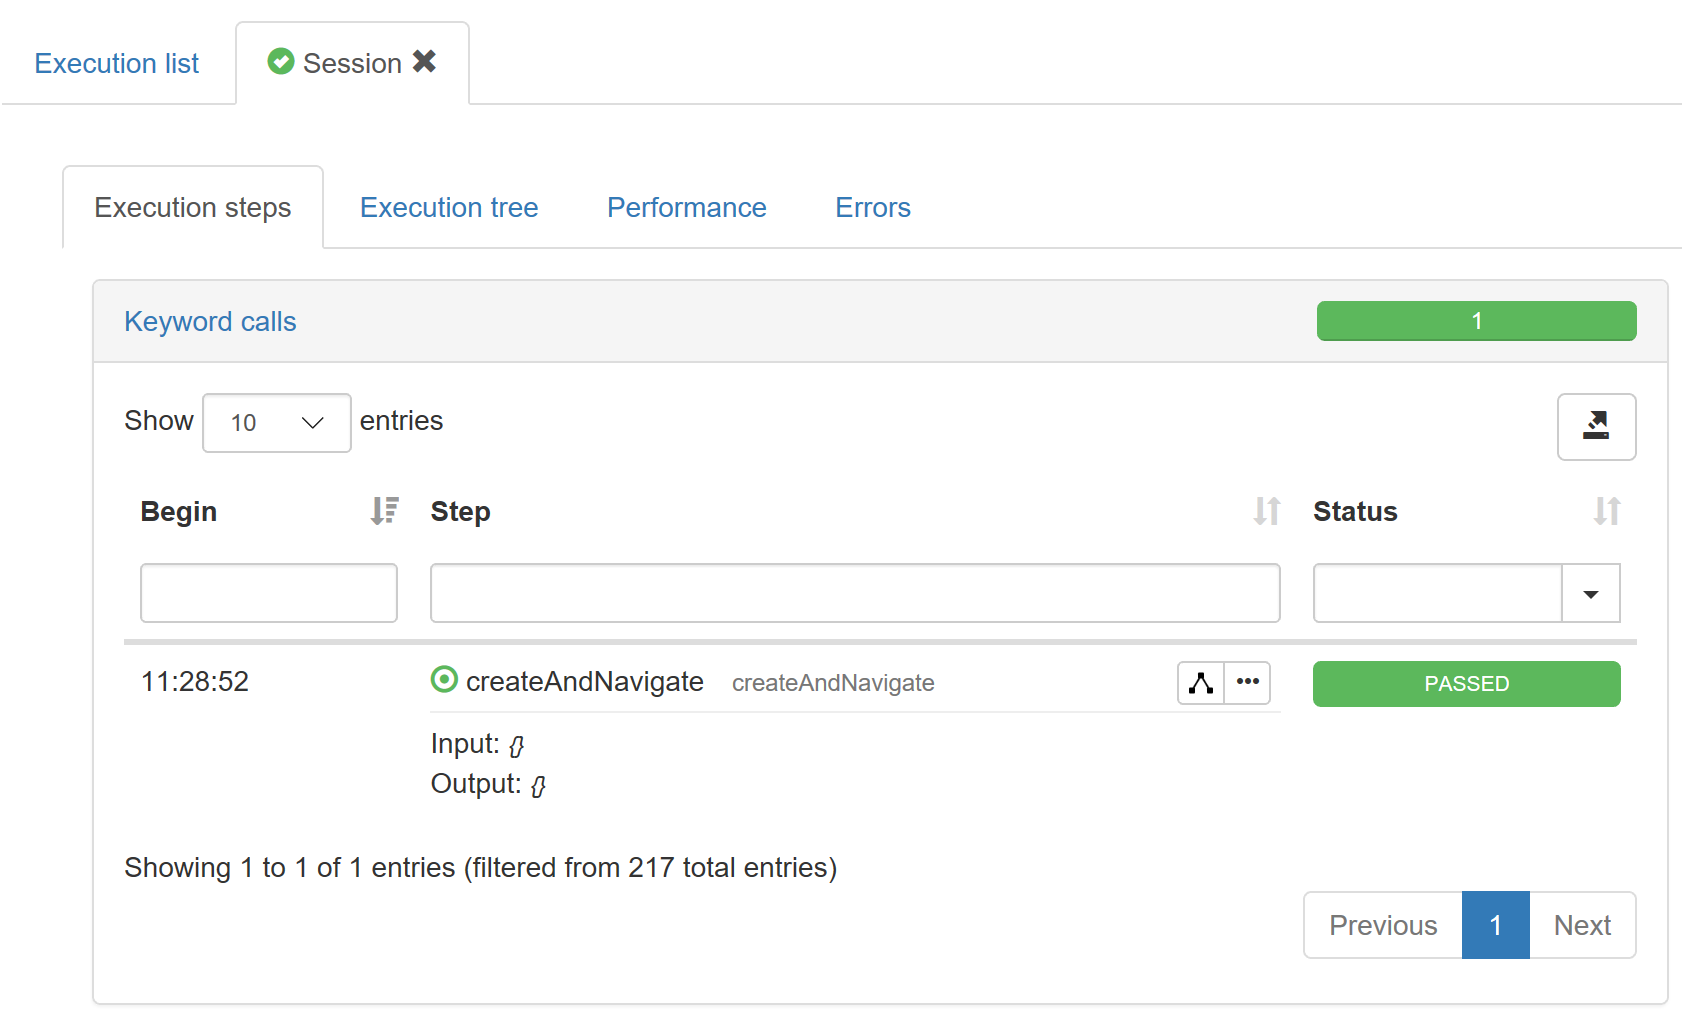
your Keyword will be executed, but this time, instead of being invoked directly from eclipse, its code will be shipped dynamically to the agent and started from there. As a result of the execution, you’ll automatically be taken to the execution view in which important information such as functional outputs or performance data will be reported.
Let’s move on to the next section to see how to make this type of information available and start getting more value out of the platform. We will run a distributed plan involving our keyword, perform functional validation against the results of our automation scenario as well as measure the latency of our web page.