Android Testing using Step and Appium
This article demonstrates the automation of mobile applications on Android using the Appium framework.

In this tutorial, we will demonstrate the automation of mobile applications on Android using the Appium framework.
Examples provided here originate from our samples repository, which is publicly available in the following GitHub project.
Pre-requisites
Before going through this tutorial, it is important to understand what Step keywords and plans are.
In addition, you will need access to a (preferably local) Step instance. Please follow the Quick setup guide to go through a quick installation process on your local computer.
Make sure that your host or laptop supports hardware acceleration. In this example, we are assuming you are running Microsoft Windows as the OS hosting the Android Virtual devices, but the exact same results can be achieved on Linux.
Android Studio setup
Install Android Studio in order to be able to create some Android Virtual devices.
You can start by downloading the latest version of Android Studio for Windows from this link.
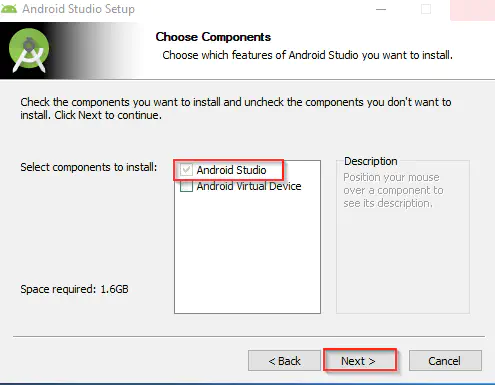
- Double-click the installation package and on the “Choose Components” screen, make sure to select only “Android Studio” and click on next: (we will install and configure the Android Virtual devices on our own)
You can leave the options in the next screens set to their default values.
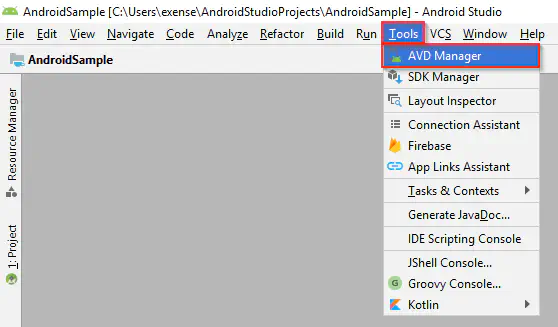
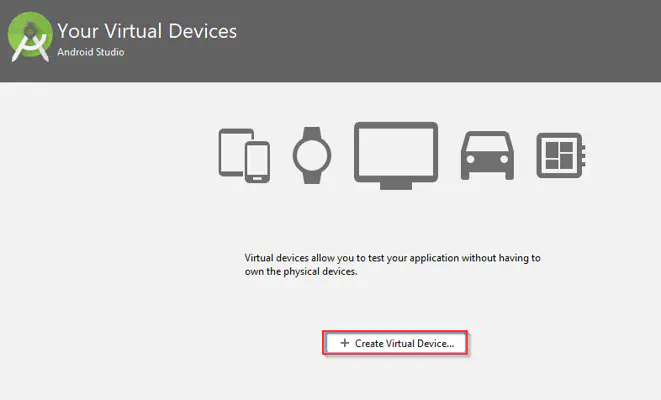
- On the next screen, click on “Create Virtual Device”:
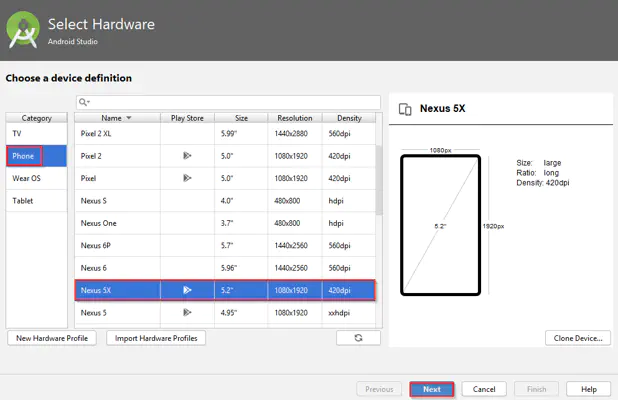
- On the hardware selection screen, choose “Phone” from the left Category panel, then “Nexus 5X” as device type, and then click on Next:
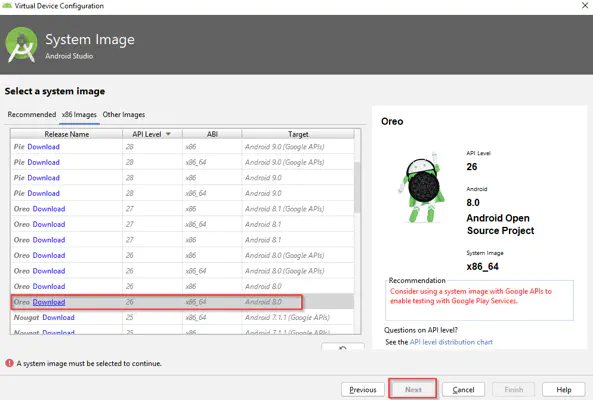
- On the system image selection screen, click on the “x86 images” tab then hit the Oreo (version 26, x86_64, without the Google APIs) Download link , wait for the download to complete than hit the Next button:
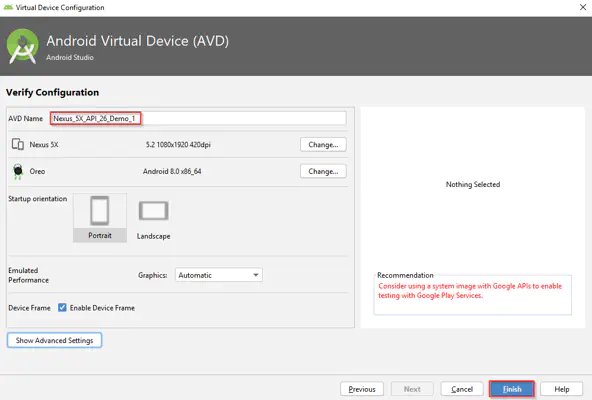
- Set the device name to Nexus_5X_API_26_Demo_1 and click on the Finish button:
You now have completed you first Android Virtual device creation!
Using the Studio CLI
Open a command prompt and navigate to the Sdk tools bin directory:
cd C:\Users\YOUR_USER_HERE\AppData\Local\Android\Sdk\tools\bin
Download the appropriate system image:
sdkmanager.bat –install "system-images;android-26;default;x86_64"
Create the Android virtual device using the following command:
avdmanager.bat create avd –name "Nexus_5X_API_26_Demo_1" –package "system-images;android-26;default;x86_64"
The prompt will ask you if you wish to create a custom hardware profile. You can type “no” and hit enter.
Check that the device has been properly created:
avdmanager.bat list avd
Results:
Name: Nexus_5X_API_26_Demo_1
Device: Nexus 5X (Google)
Path: C:\Users\exense\.android\avd\Nexus_5X_API_26_Demo_1.avd
Target: Google Play (Google Inc.)
Try the sample
Get the Appium client apk
This sample is based on a demo application provided by Appium. To continue, download the application file from the Appium Github and put it in the location of your choice.
Run the JUnit demo
The Appium keywords sample is located in the demo-appium-keyword folder in the Step sample repository hosted on Github.
You can continue by cloning this repository and opening the project in your favorite IDE (we will use Eclipse in the remaining steps of the tutorial).
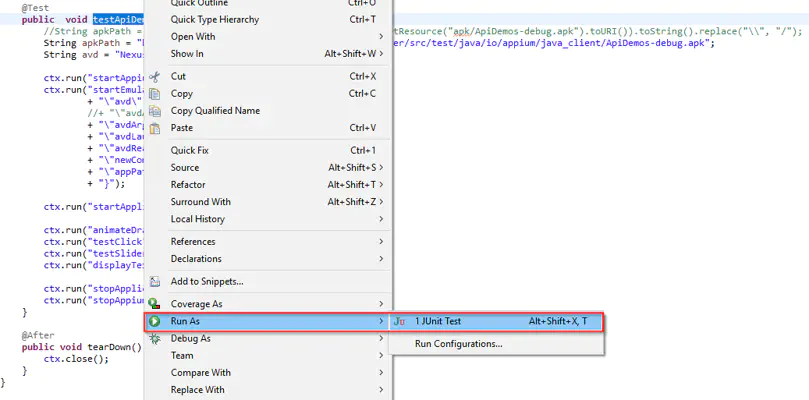
Since we previously created an AVD named “Nexus_5X_API_26_Demo_1”, you can directly open the AppiumKeywordExampleTest class and execute the JUnit tests called testApiDemo:
You can now see the Android Virtual device booting, and once the boot sequence completed, the keywords being executed.
Scaling out your executions
Let’s now take a look at how Step can be leveraged to scale out the keyword executions on multiple devices. We’ll create a 2nd device called “Nexus_5X_API_26_Demo_2” using Android Studio again.
Building and deploying the keywords
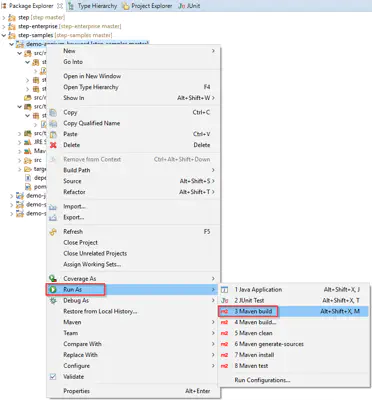
First we have to package the keywords as a JAR file using Maven or any other dependency management tool. Using Eclipse, we’ll right-click the project name and then choose “Run as → Maven build”. The Maven goals to use would be “clean package”:
You can now follow the keyword registration documentation to register the keywords (with Type = Script) within Step.
Plan samples
You can download the sample plans from here: Appium sample plans.
Once downloaded, import them to your Step instance from the “Plans” tab by clicking on the button labeled “Import plan” located in the top right corner of the Plans view, next to the “New Plan” button. A window will pop up, allowing you to drag and drop the plan file. Then make sure to click “Save”:

You can now execute the plan “Orchestrate_Demo_Multiple_Devices”, which will trigger the execution of the Appium keywords on 2 devices simultaneously, as illustrated in this second video:
Going further
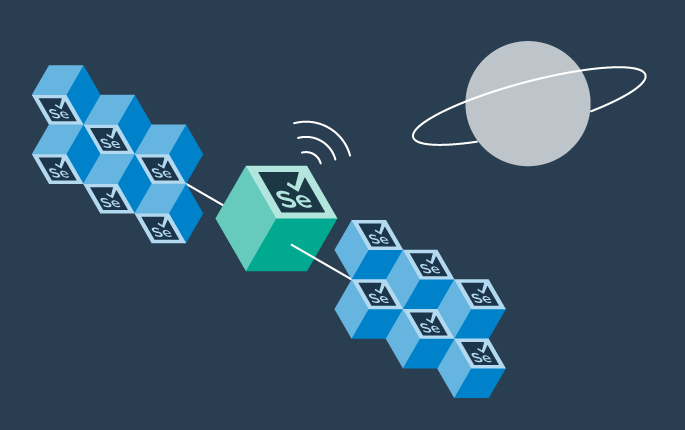
One of the interesting things to note about Step’s Keyword API and Appium is that not only can they be used for application automation, but also to manage the Android devices themselves. This is a very efficient way of achieving scale, especially when combining these tools with technology such as Docker and Kubernetes, which is what we do in our own cloud. Devices can be booted on demand, applications can be deployed, and automation scenarios can be executed.
Here’s a hint of what the architecture looks like if you package your Step agent along with the emulators:
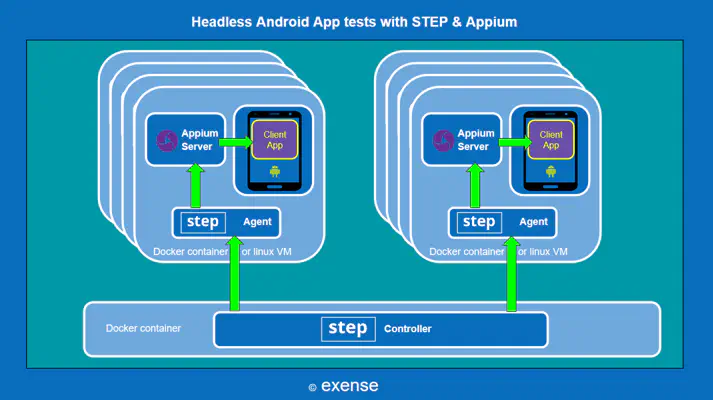
While we can not disclose the entire source code and details for managing our private cloud-based farms, we encourage users to try and build their own Android emulator farms and manage them using this strategy, which has been very successful for us. You can send any questions on this topic to support@exense.ch or using our contact page
See also:
A full case study on Android automation and emulation in the cloud for a large Swiss corporation
Summary: This article demonstrates the automation of mobile applications on Android using the Appium framework.
This article demonstrates how to connect Grafana to data generated by Step.
This article demonstrates how to set up distributed system monitoring using Keyword executions, and analyze the results as measurements.
This tutorial demonstrates how to automate interaction with Microsoft Office applications using the Office Interop Assembly.

This article provides documentation for how to integrate JUnit tests into Step.
This tutorial demonstrates how Step can be used to monitor services, availability and performance metrics.
This tutorial demonstrates how to utilize the AutoIt C# binding to automate interactions with Windows applications.
This article defines three Keywords which will be used in browser-based automation scenarios, using Step and Selenium, as general drivers.

This tutorial shows you how to efficiently set up a browser-based load test using existing Cypress tests in the Step automation platform.
In this short tutorial, we show how to quickly implement a simple browser-based load test based on Cypress scripts in Step.

This tutorial shows you how to efficiently set up a browser-based load test using existing Playwright tests in the Step automation platform.

This article explains Keywords in Step and demonstrates how to create simple ones.
This tutorial demonstrates the design, execution, and analysis of functional tests using the web interface of Step.
This tutorial will demonstrate how to use Step and Selenium to automate various browser tasks.
This tutorial demonstrates how to use Step and Cypress to automate various browser tasks.
This tutorial demonstrates how Selenium automation tests can be turned into full synthetic monitoring using Step.
In this tutorial, we'll show you how to easily set up and run a browser-based load test with Step's wizard, using your existing Cypress tests, on the Step automation platform.

This tutorial shows you how to efficiently set up a browser-based load test using existing Selenium tests in the Step automation platform.
This tutorial demonstrates how Playwright automation tests can be turned into full synthetic monitoring using Step.
This tutorial demonstrates how Cypress automation tests can be turned into full synthetic monitoring using Step.

This tutorial will demonstrate how to use Step and Playwright to automate various browser tasks.
In this tutorial, we'll show you how to easily set up and run a browser-based load test with Step's wizard, using your existing Playwright tests, on the Step automation platform.
Learn how to quickly set up continuous browser-based load testing using Cypress tests in your DevOps pipeline
Quickly integrate K6 based load-tests in your DevOps workflow
This tutorial demonstrates how Playwright tests can be reused for synthetic monitoring of a productive environment in a DevOps workflow
This tutorial demonstrates how Playwright tests can be reused for synthetic monitoring of a productive environment in a DevOps workflow
In this tutorial you'll learn how to quickly set up a protocol-based load test with okhttp

Learn how to set up continuous end-to-end testing across several applications based on Playwright tests in your DevOps pipeline using Step
Learn how to quickly set up continuous browser-based load testing using Playwright tests in your DevOps pipeline
Want to hear our latest updates about automation?
Don't miss out on our regular blog posts - Subscribe now!
